
Before You Begin – Unboxing & Part Orientation
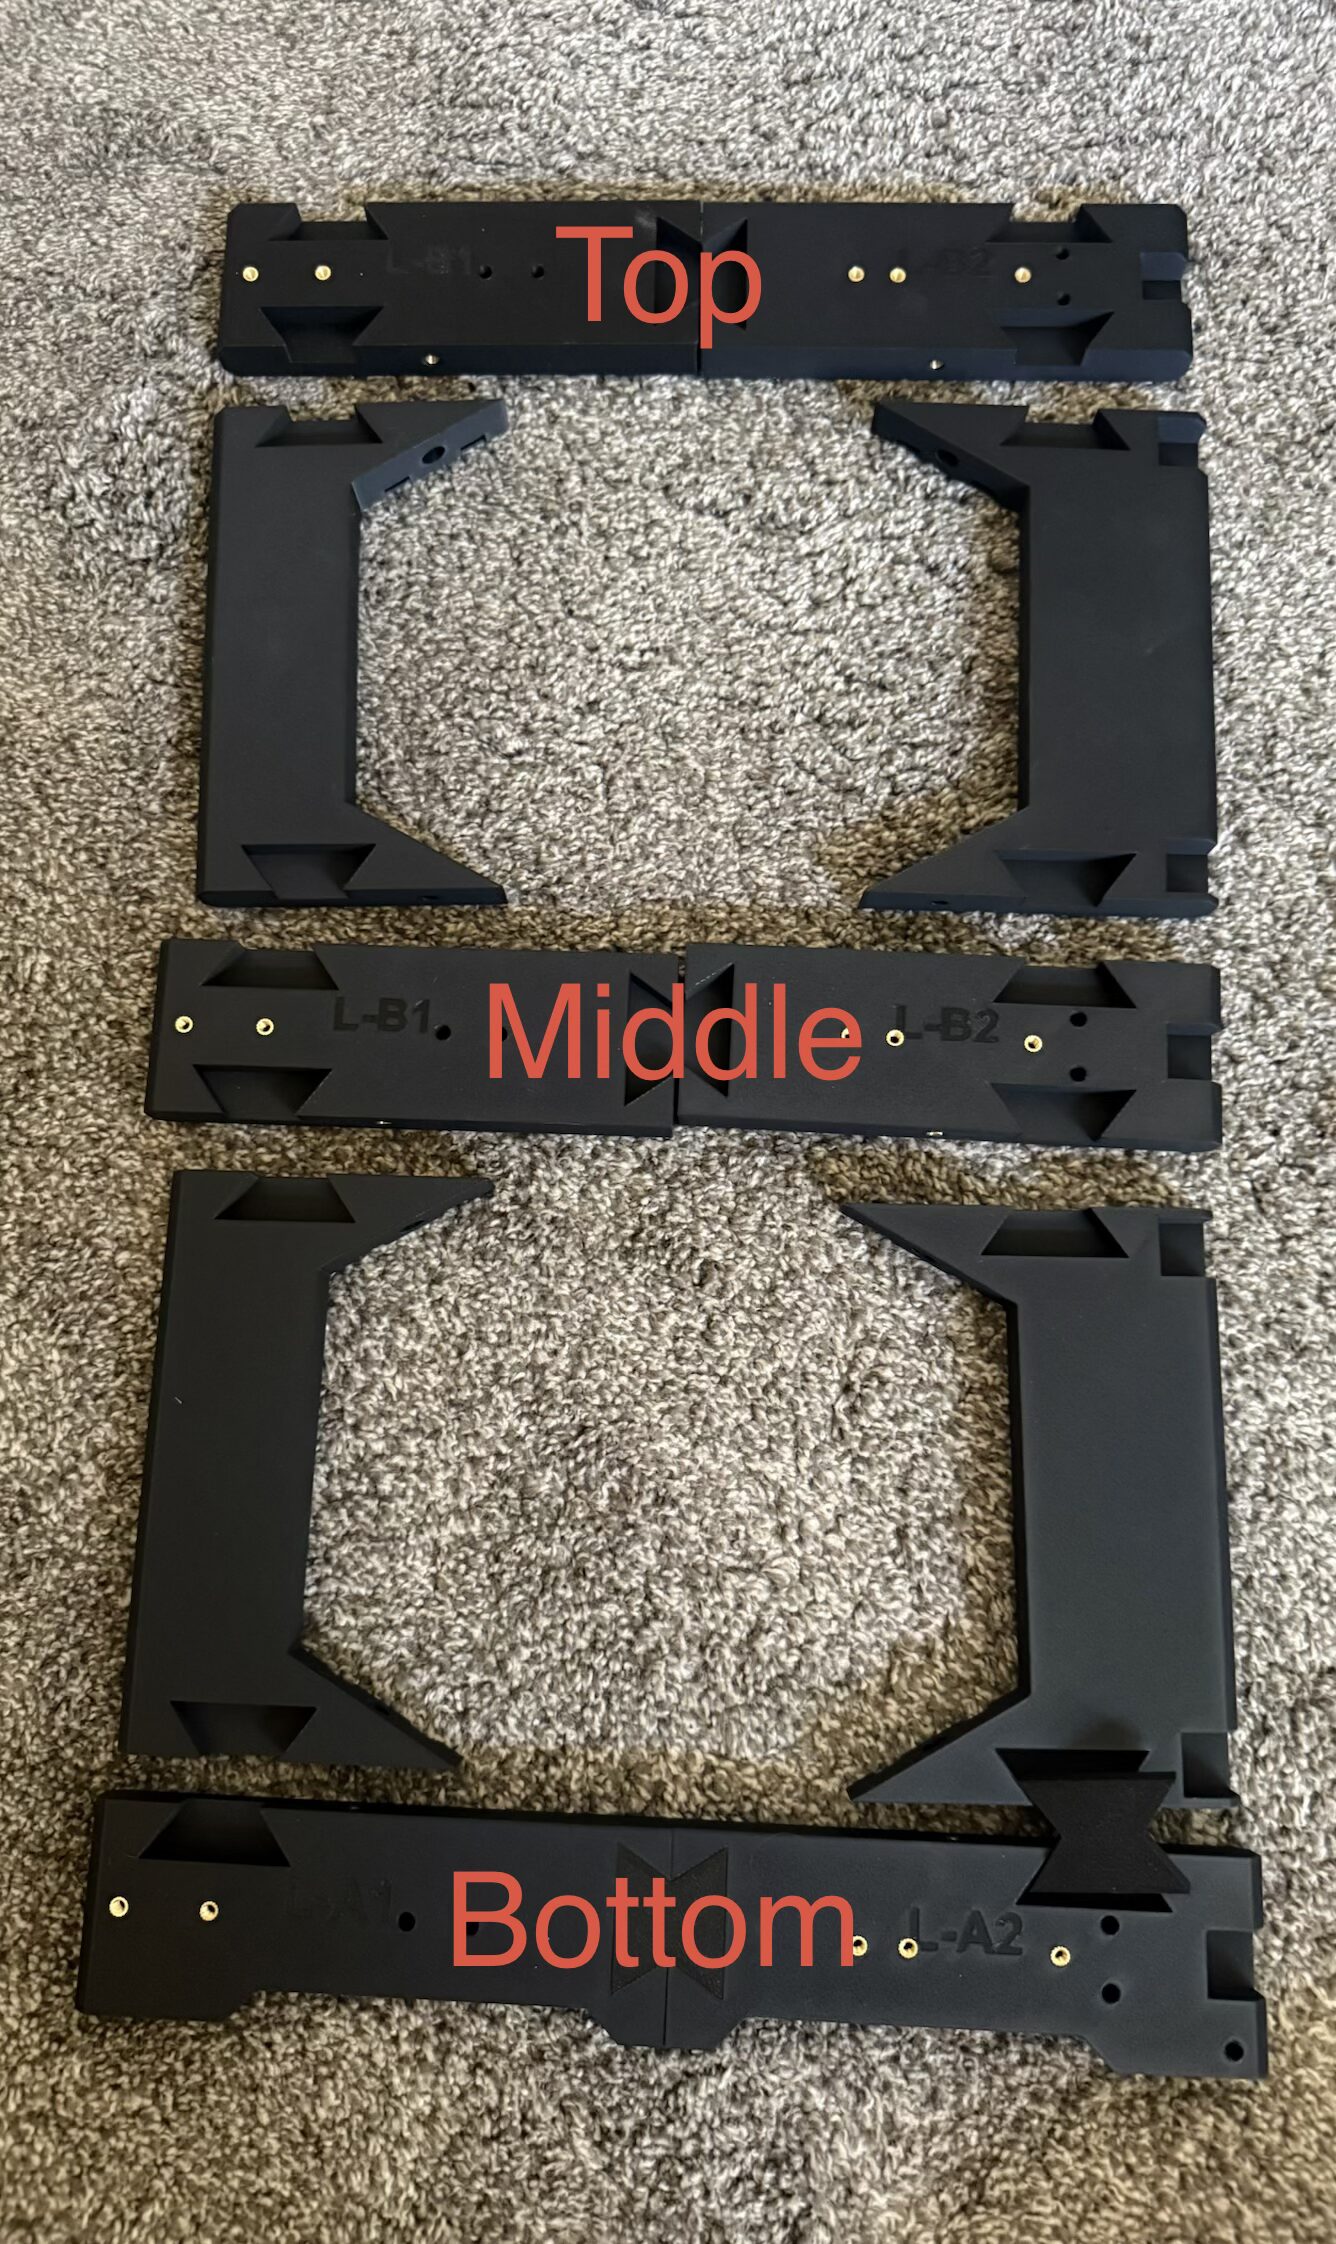
The image shows the correct orientation of:
- Top Section
- Middle Section
- Bottom Section
Assembly Instructions
Please follow the steps below in order. Do not fully tighten screws until instructed.
Step 1 – Prepare Main Frame
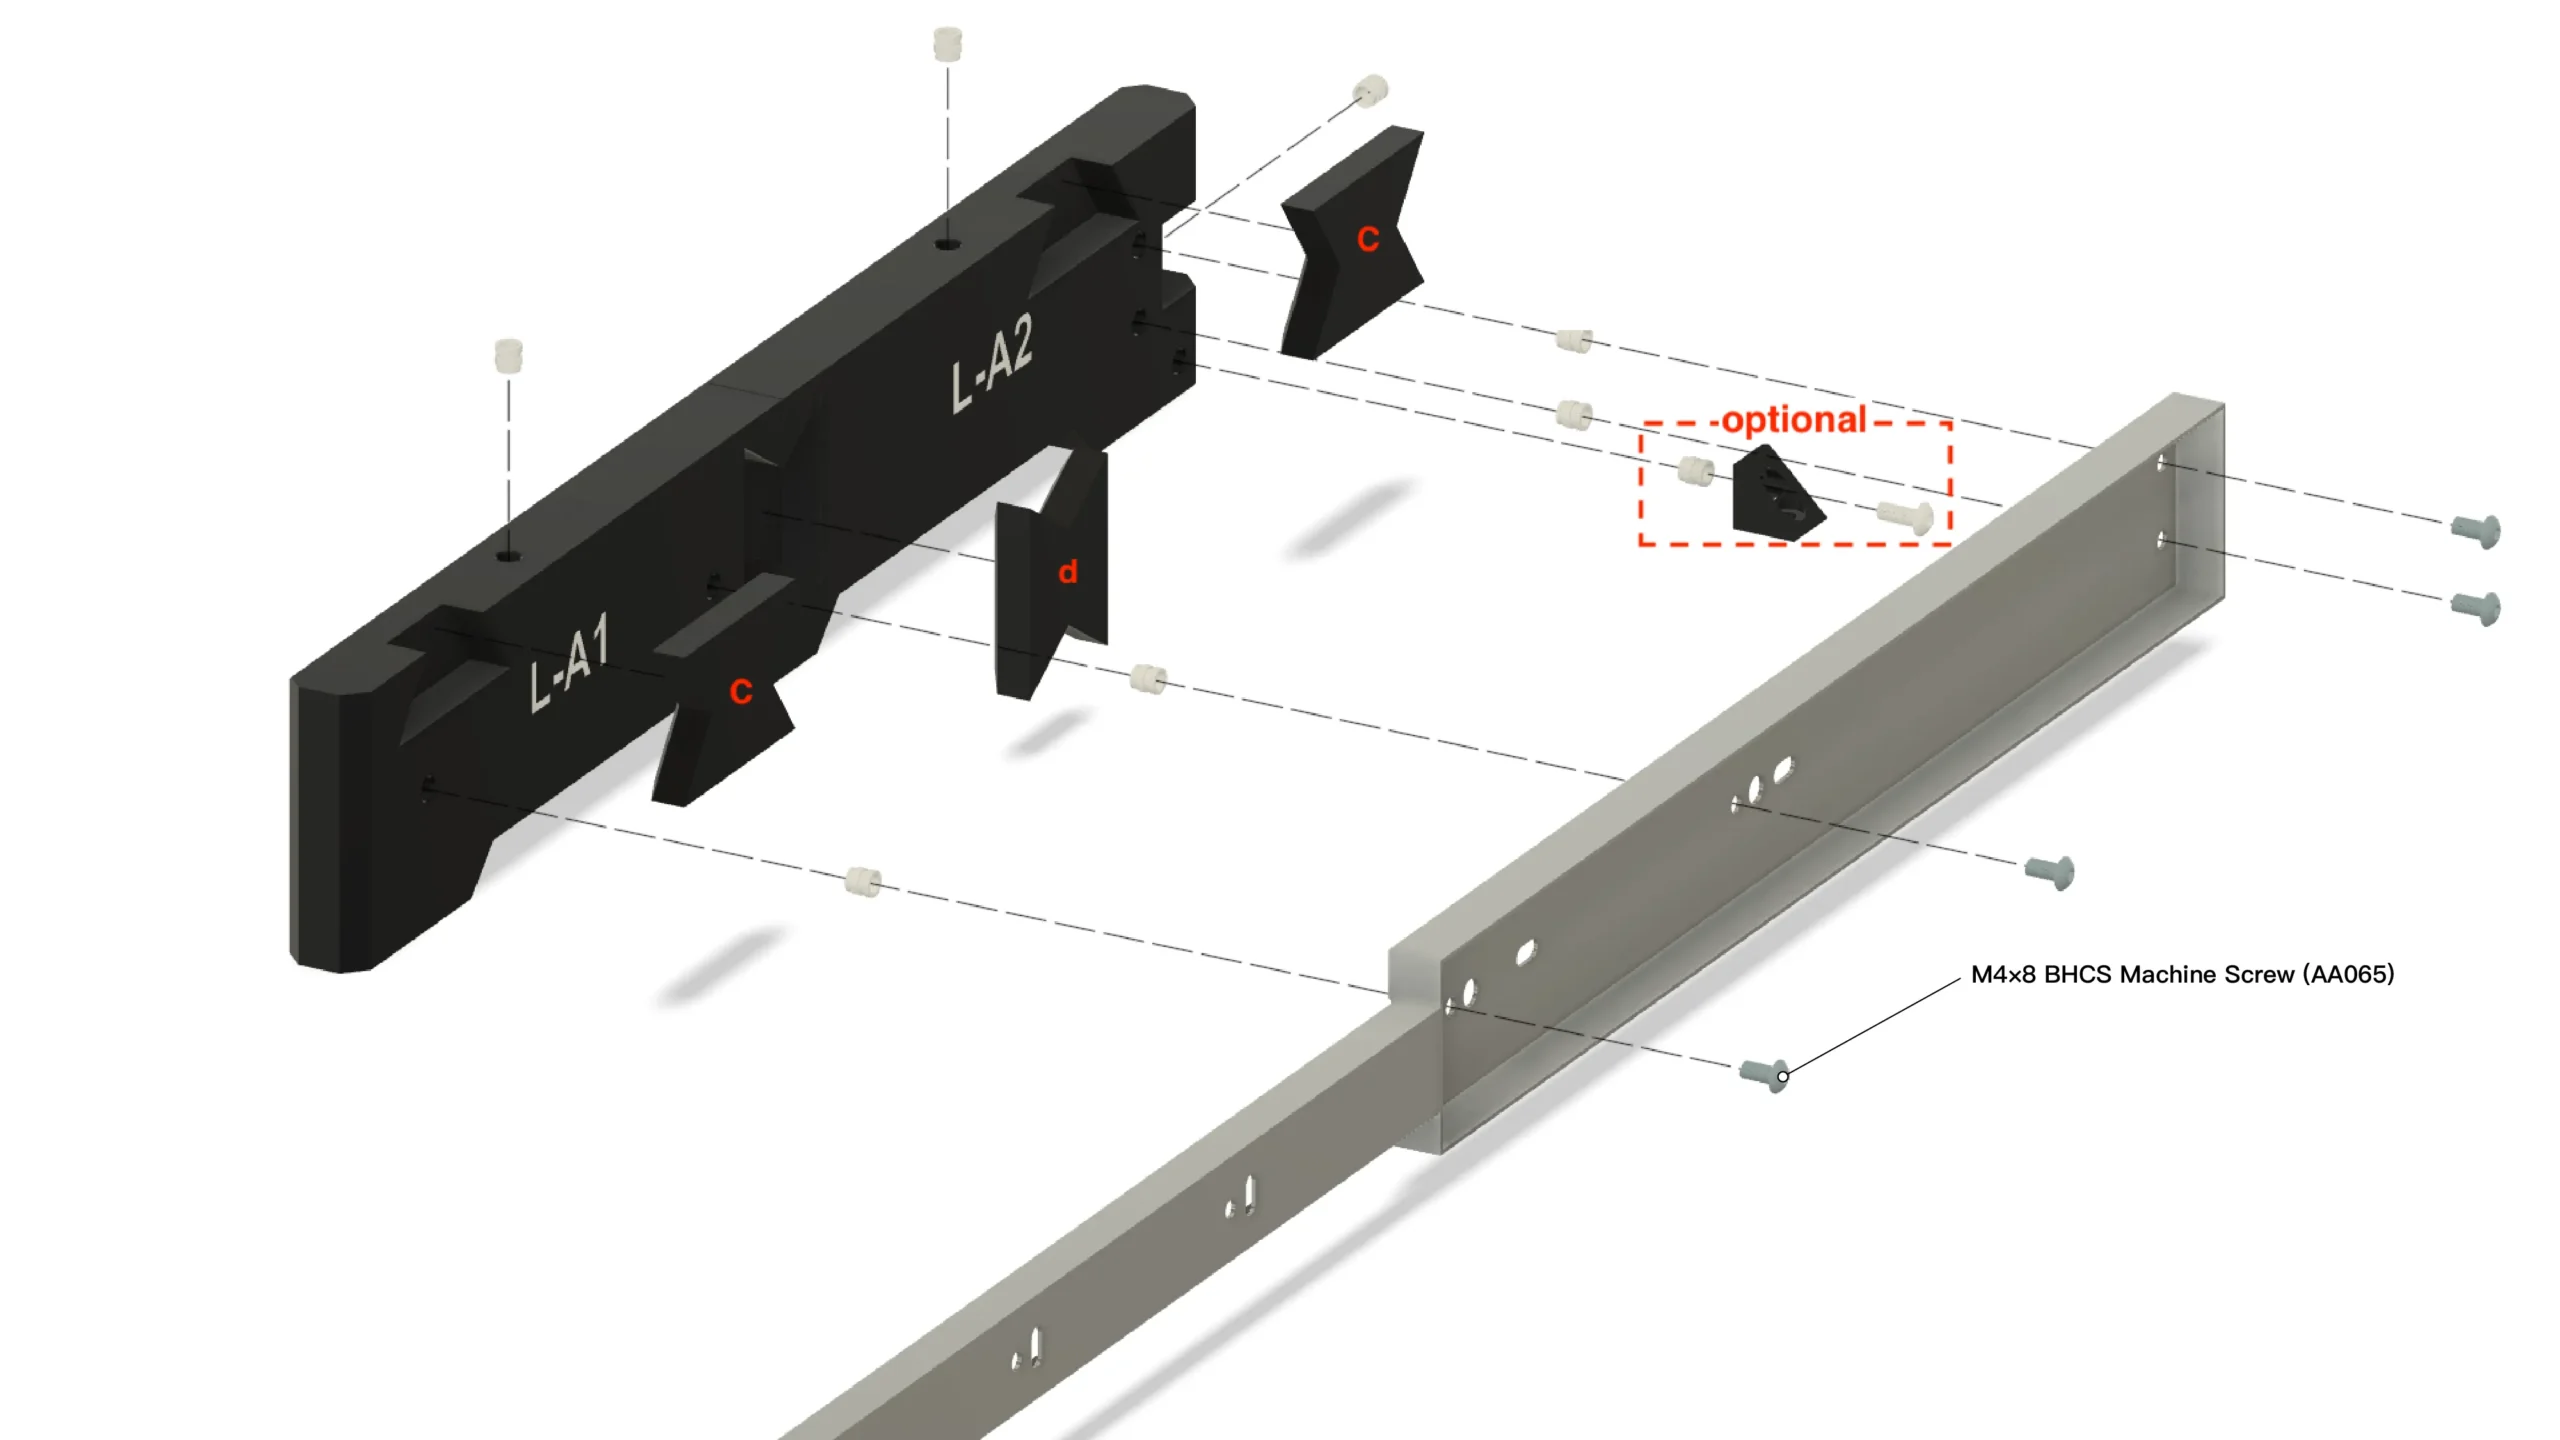
Identify the left (L-A1) and right (L-A2) frame sections. Install the insert nuts into the designated holes at the top of each frame section.
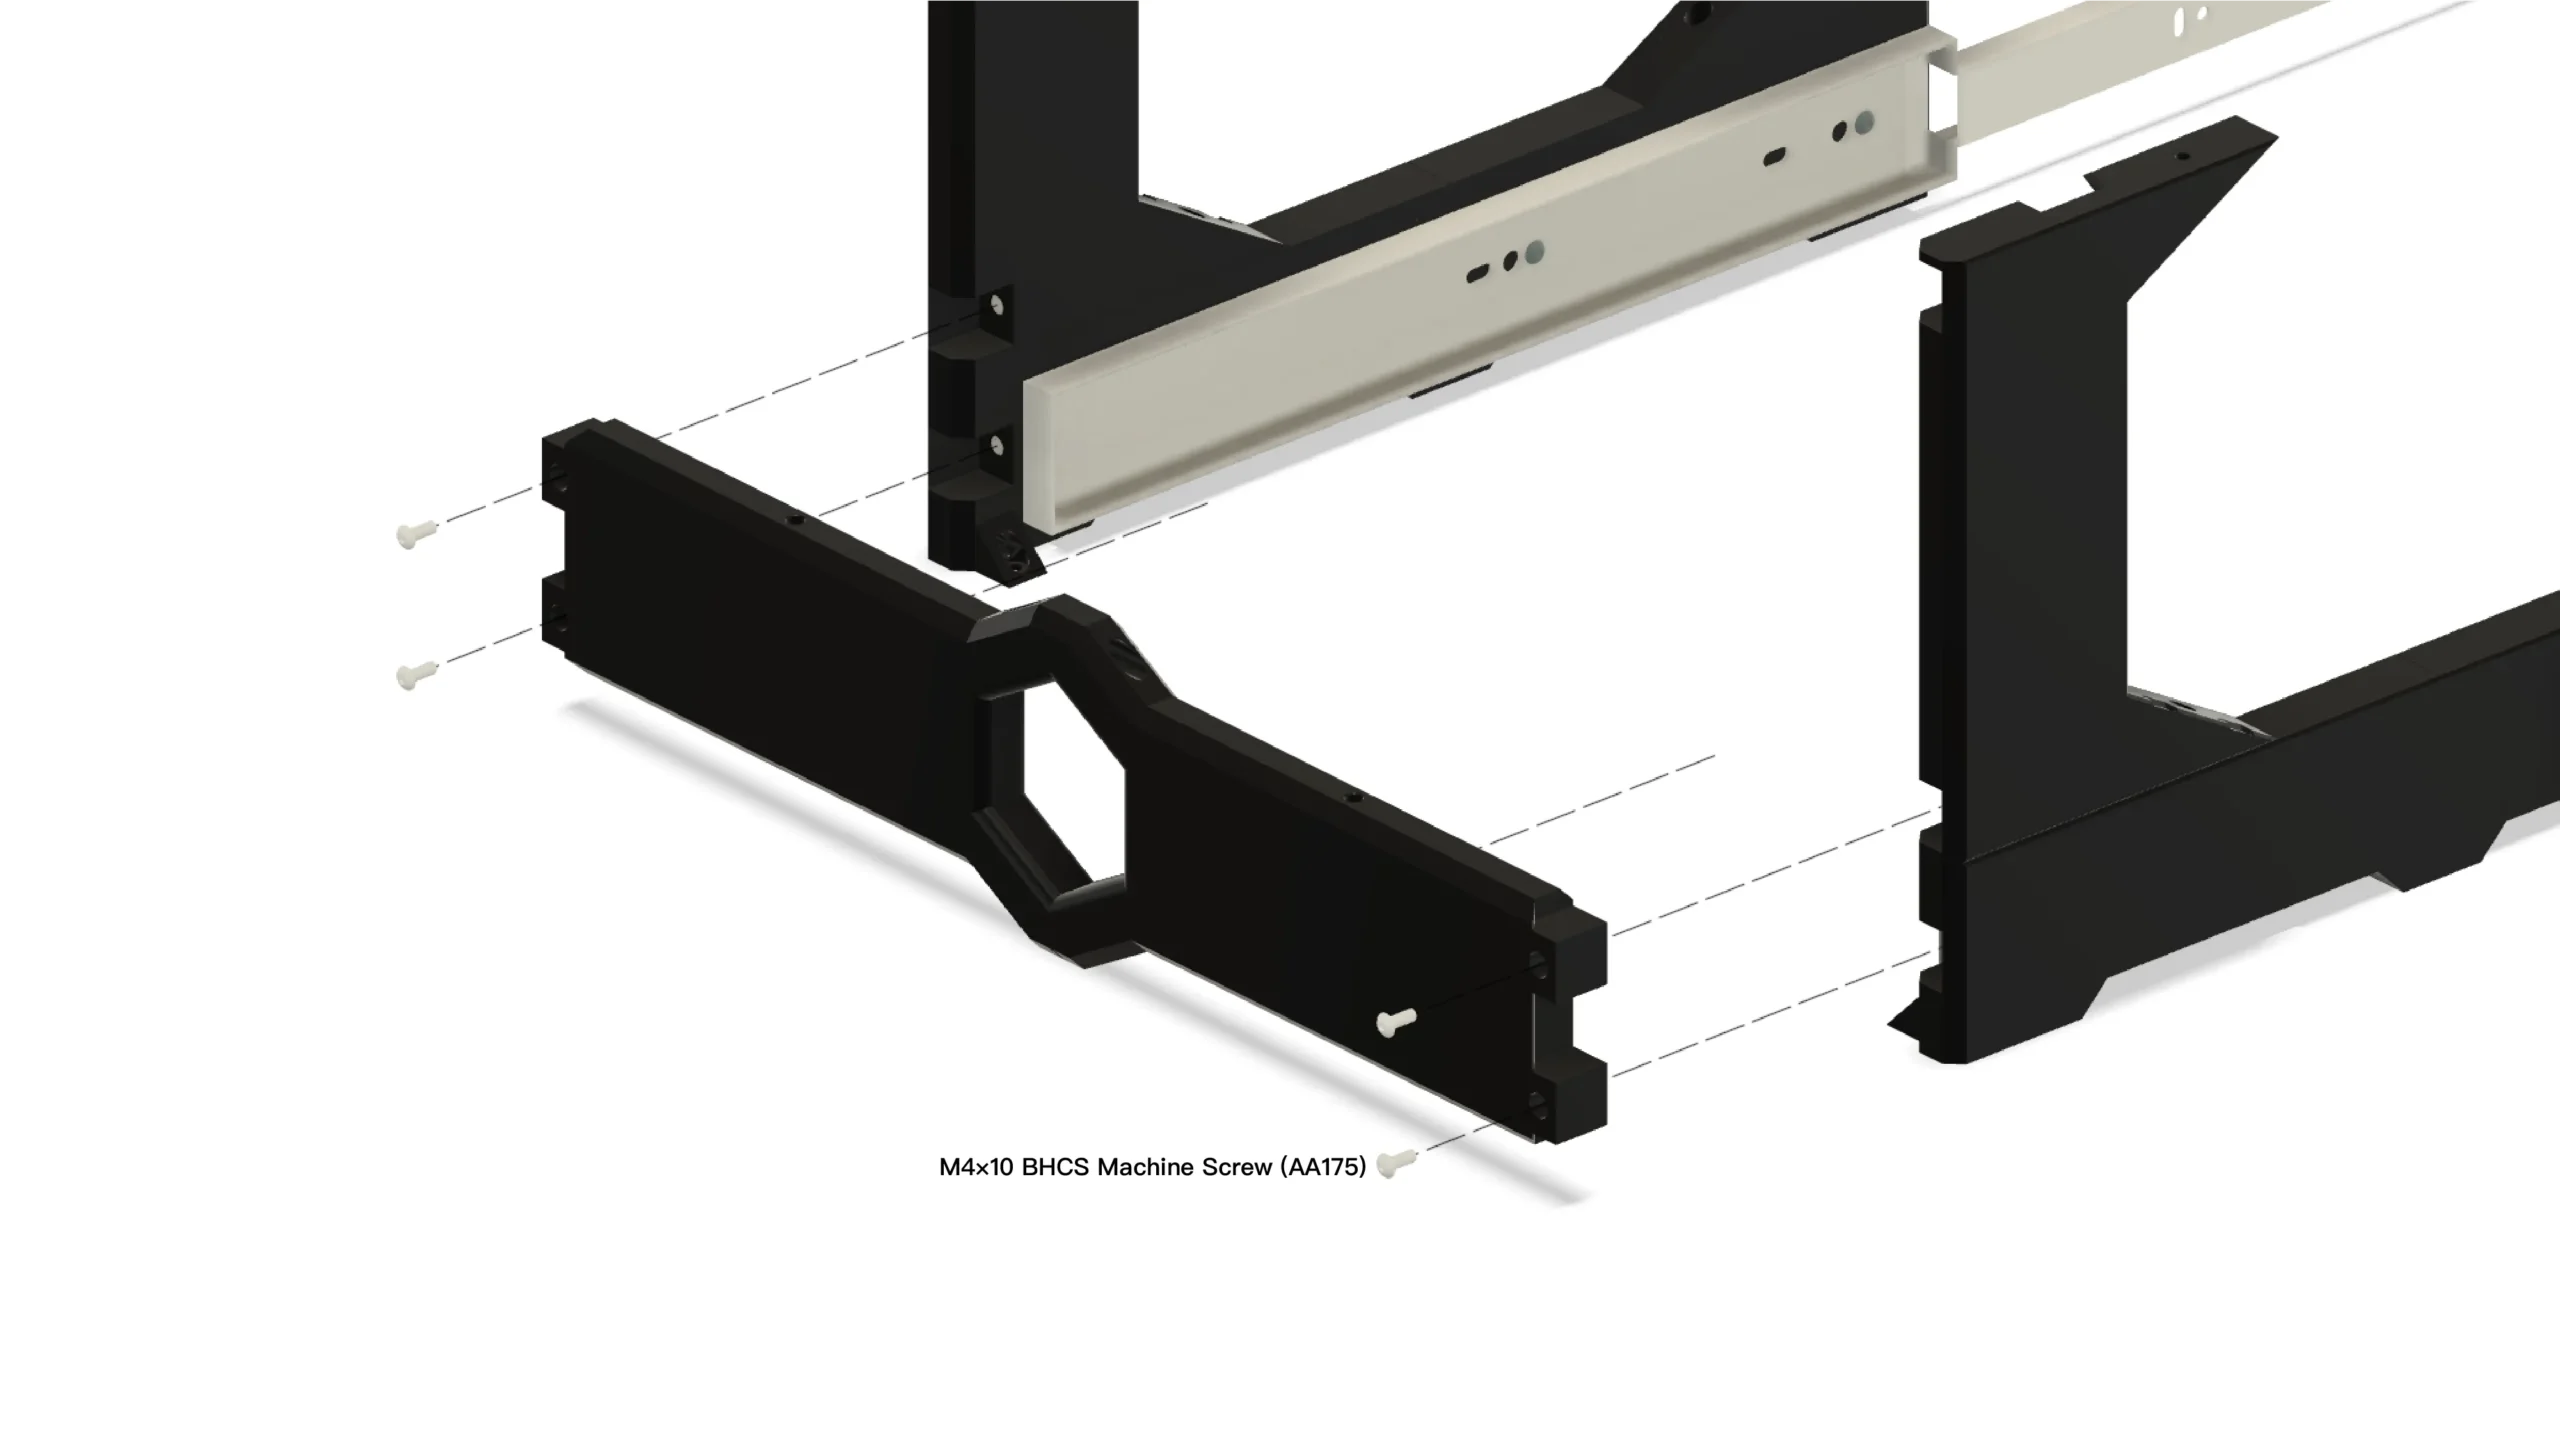
Step 2 – Install Center Support Brackets (Part C)
Slide the C brackets into position on both sides of the frame. Secure using:
- M4x10 BHCS Machine Screws (AA175)
- M4x6x6 Insert Nuts (AB016)
Do not fully tighten yet.
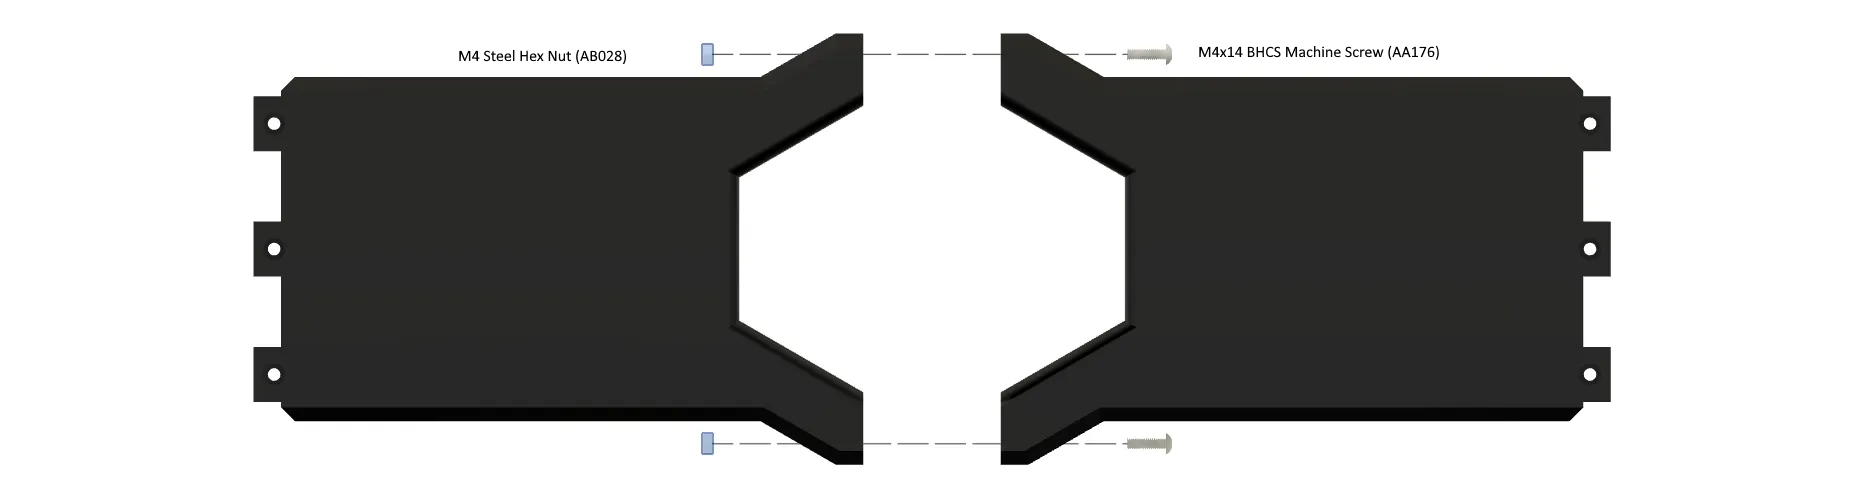
Step 3 – Build Lower Cross Bar
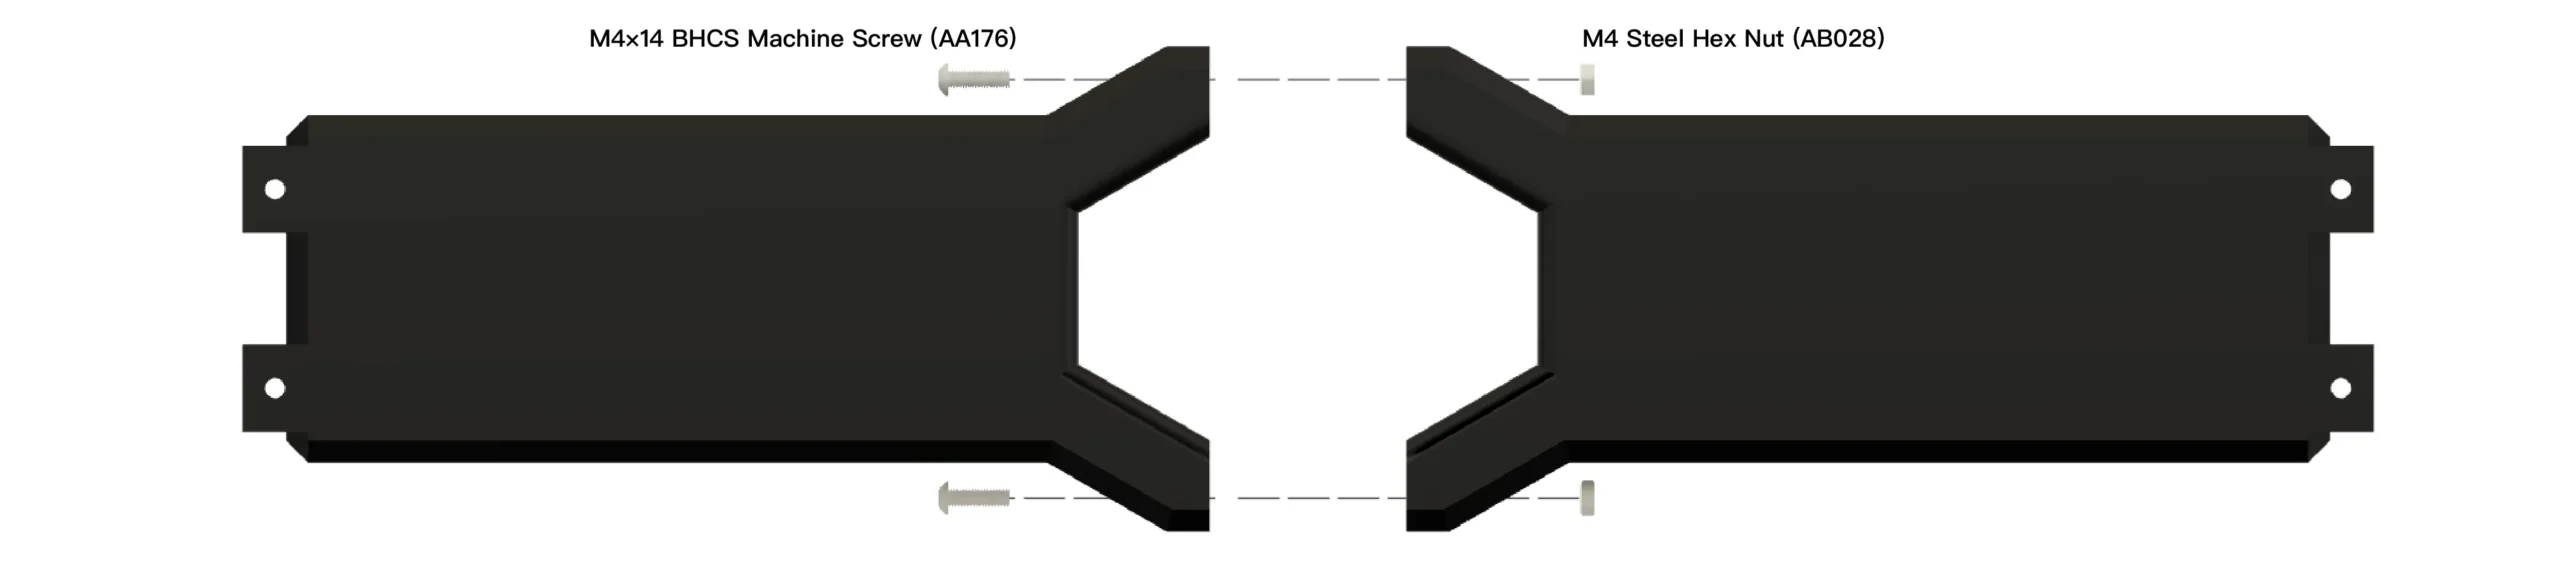
Align both frame halves together. Install:
- M4x14 BHCS Machine Screw (AA176)
- M4 Steel Hex Nut (AB028)
Tighten securely once both top and bottom screws are installed.
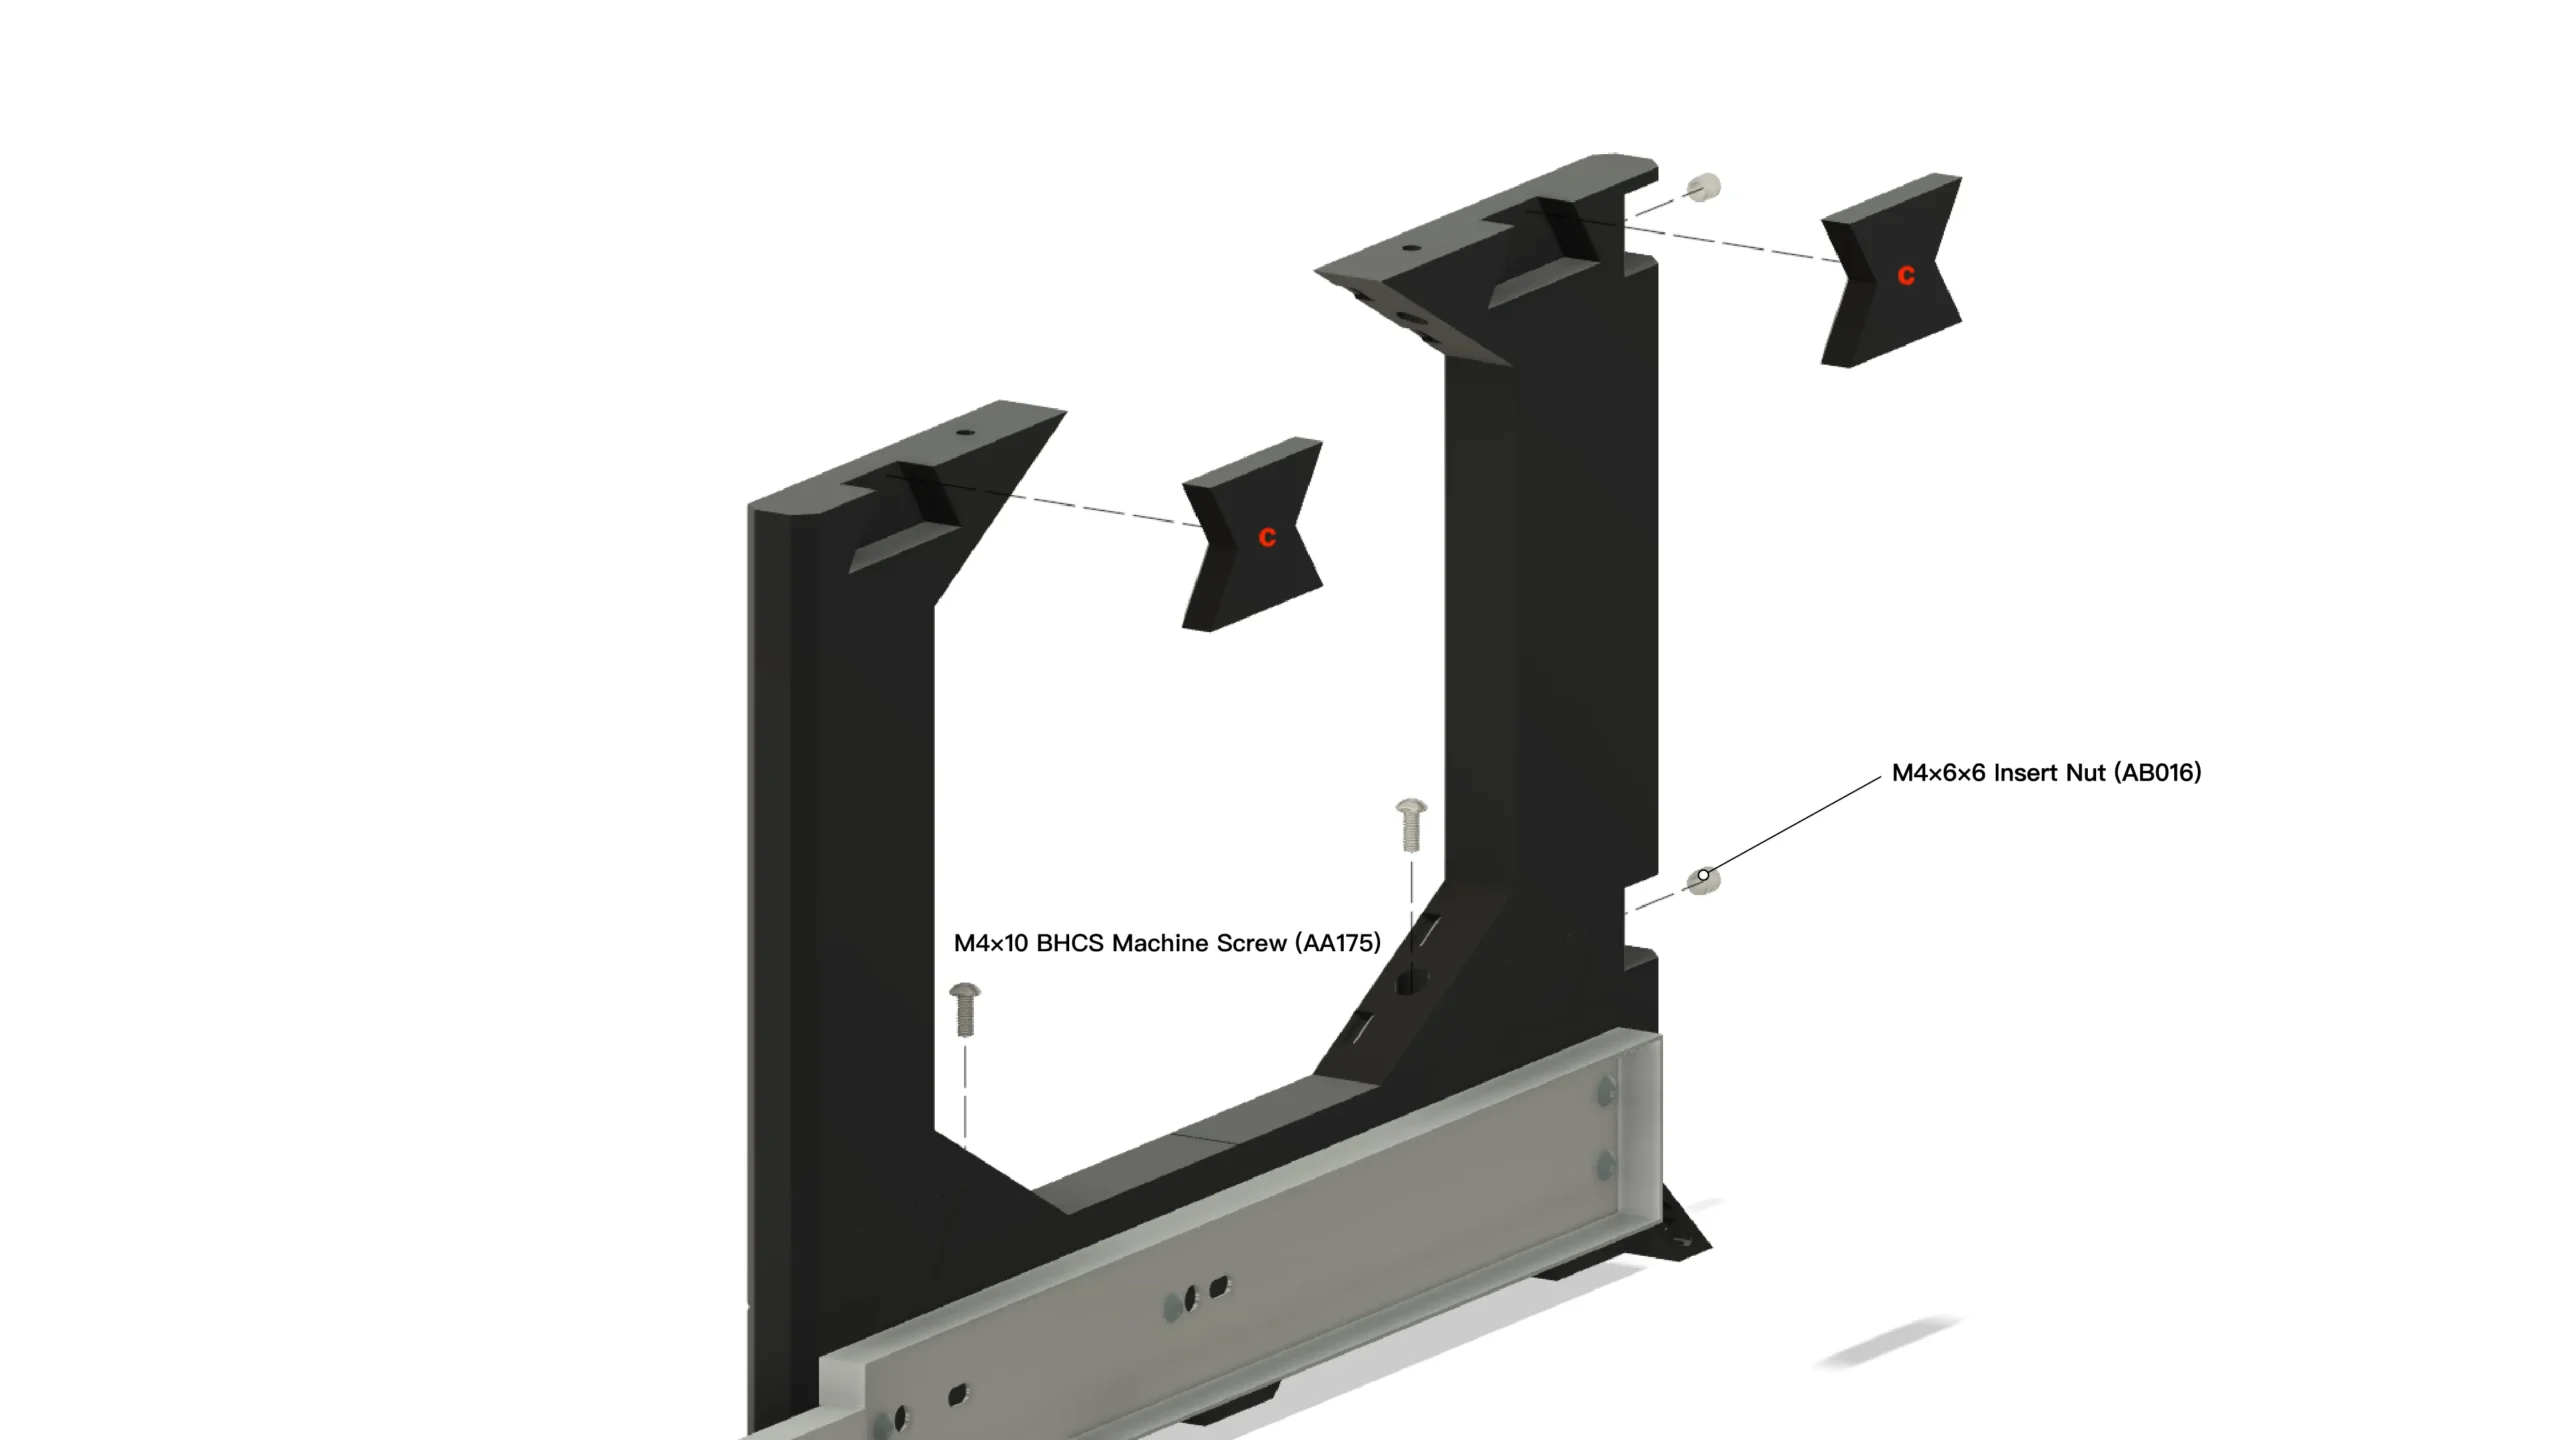
Step 4 – Install Lower Cross Bar
Attach the lower cross bar between the vertical frame supports. Use:
- M4x10 BHCS Machine Screws (AA175)
Ensure the bar sits flush before tightening.
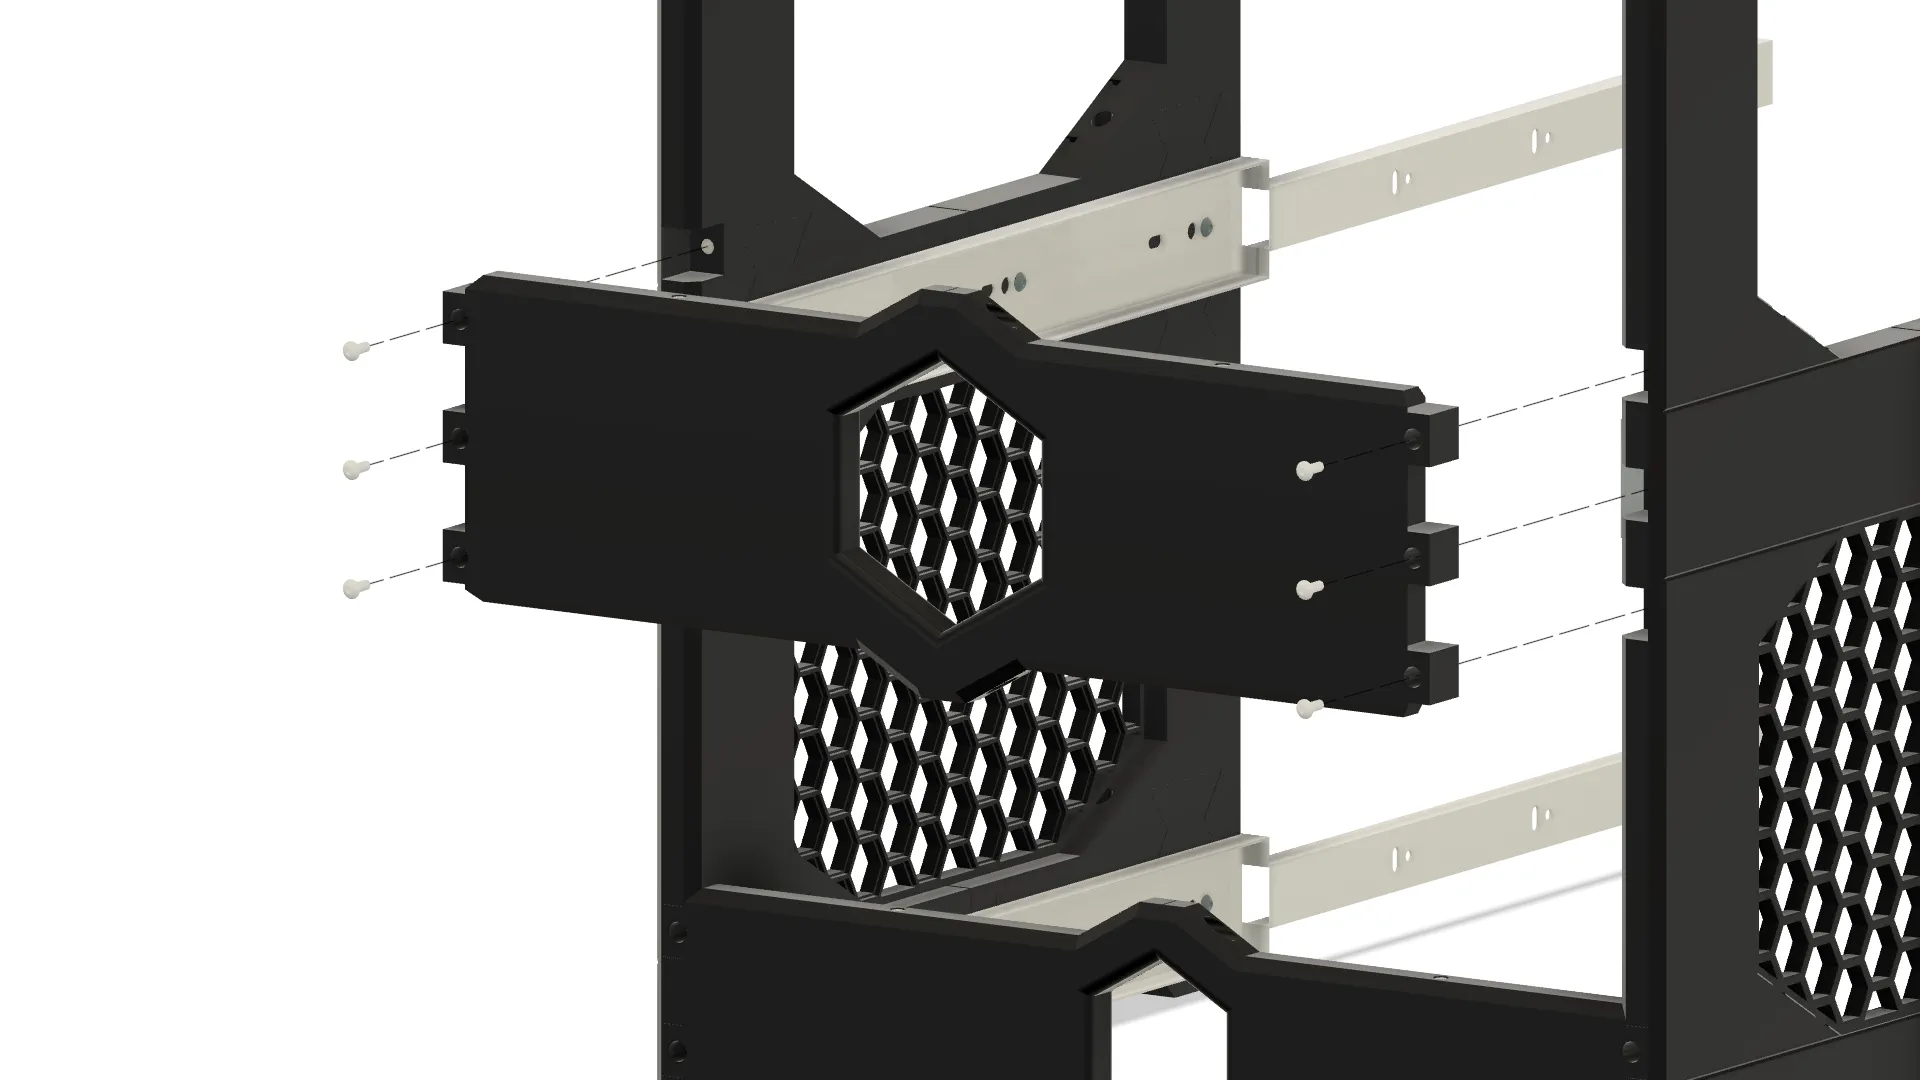
Step 5 – Build Back-Middle Cross Bar
Position the front frame panel with the hex opening centered. Secure with:
- M4x10 BHCS Machine Screws (AA175)
Install screws evenly on both sides before fully tightening.
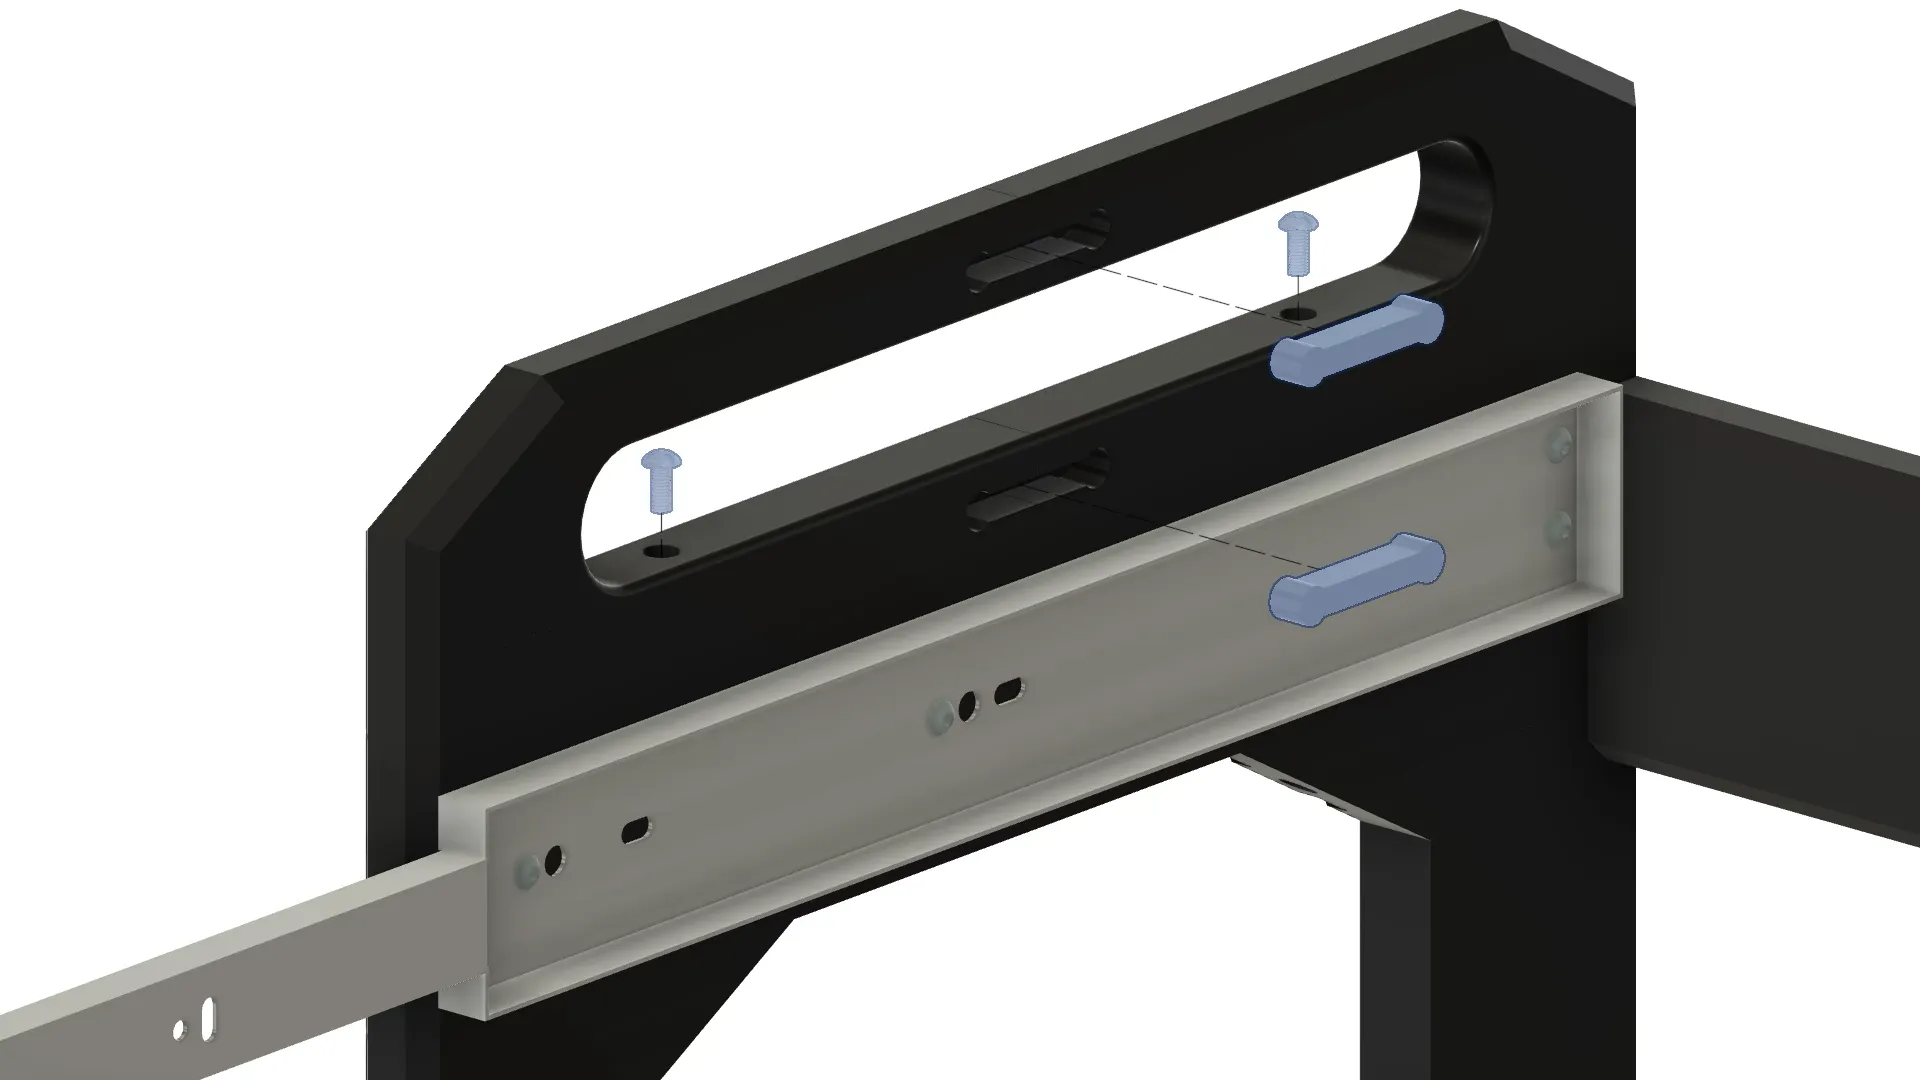
Step 6 – Install Sliding Rail Assembly
Slide the metal rail into the frame brackets. Align the mounting holes and secure using:
- M4x8 BHCS Machine Screws (AA065)
Ensure smooth sliding movement before tightening completely.
Step 7 – Attach Top Handles
Align the rear honeycomb panel with the frame. Secure using the provided screws. Ensure panel sits flat against mounting surface.
Step 8 – Final Assembly & Tightening

Install remaining fasteners and tighten all hardware fully. Check alignment and confirm:
- All screws are secure
- Frame is square
- Sliding components move freely
Final Check
- Re-check all screws after initial installation
- Confirm proper alignment before use
- Retighten hardware after first use if necessary